


Preserving the beauty of roses is an art that extends their life beyond their natural bloom. Dried roses carry the memory of memorable moments, and learning how to preserve dried roses can ensure that these memories last for years to come.
This guide provides a comprehensive overview of how to preserve dried roses, ensuring their beauty and sentimental value can be enjoyed for years to come. We will explore various methods for dried rose preservation, from simple air-drying to more advanced techniques like using silica gel and resin.
1. Using Wax To Preserve Dried Roses
Wax preservation is an exquisite method for those wondering how to preserve dried roses. This technique can maintain fresh roses' shape, colour, and texture. Here are the steps:
-
Select the Wax: Choose either paraffin or beeswax for the preservation process. Beeswax and paraffin can be melted and applied to the petals of roses, creating a protective barrier. This barrier helps seal the petals and prevent moisture loss, which is a common cause of wilting and decay in cut flowers.
-
Melt the Wax: Use a double boiler to melt your chosen wax. Heat it until it becomes completely liquid. Use a thermometer to monitor the temperature of the melted wax. Different types of wax have different melting points, and it's essential to heat the wax to the correct temperature for your specific project to avoid overheating or underheating.
-
Prepare the Roses: Make sure your roses are dried and ready for waxing. The roses are dry when they feel papery. Remember, the drying process and time can vary based on the humidity and temperature of your environment.
-
Dip the Roses in Wax: Carefully dip each rose into the melted wax, ensuring they are fully coated. After the first dip, let the wax cool for a moment on the rose. Assess the coverage. If there are thin spots or missed areas, a second dip can help.
-
Remove Excess Wax: After dipping, gently shake off any excess wax from the roses.
-
Dry the Roses: Allow the wax-coated roses to dry. This will solidify the wax. After dipping, the wax needs to harden. This can take about 30 minutes to an hour. In cooler environments, it may harden faster. Try to work in a dry environment. Humidity can affect how well the wax sets and adheres to the petals.
- Display or Use: Once dry, the roses are ready to be displayed in a vase, incorporated into a wreath, or used in bouquets for weddings or special events. The wax coating should be hard to the touch, indicating that it has set properly. It forms a protective layer around the petals, which helps in preserving the shape and colour of the rose.
This method is also a great way to preserve roses in bouquets for weddings or other special events, as the wax adds sturdiness to the petals.
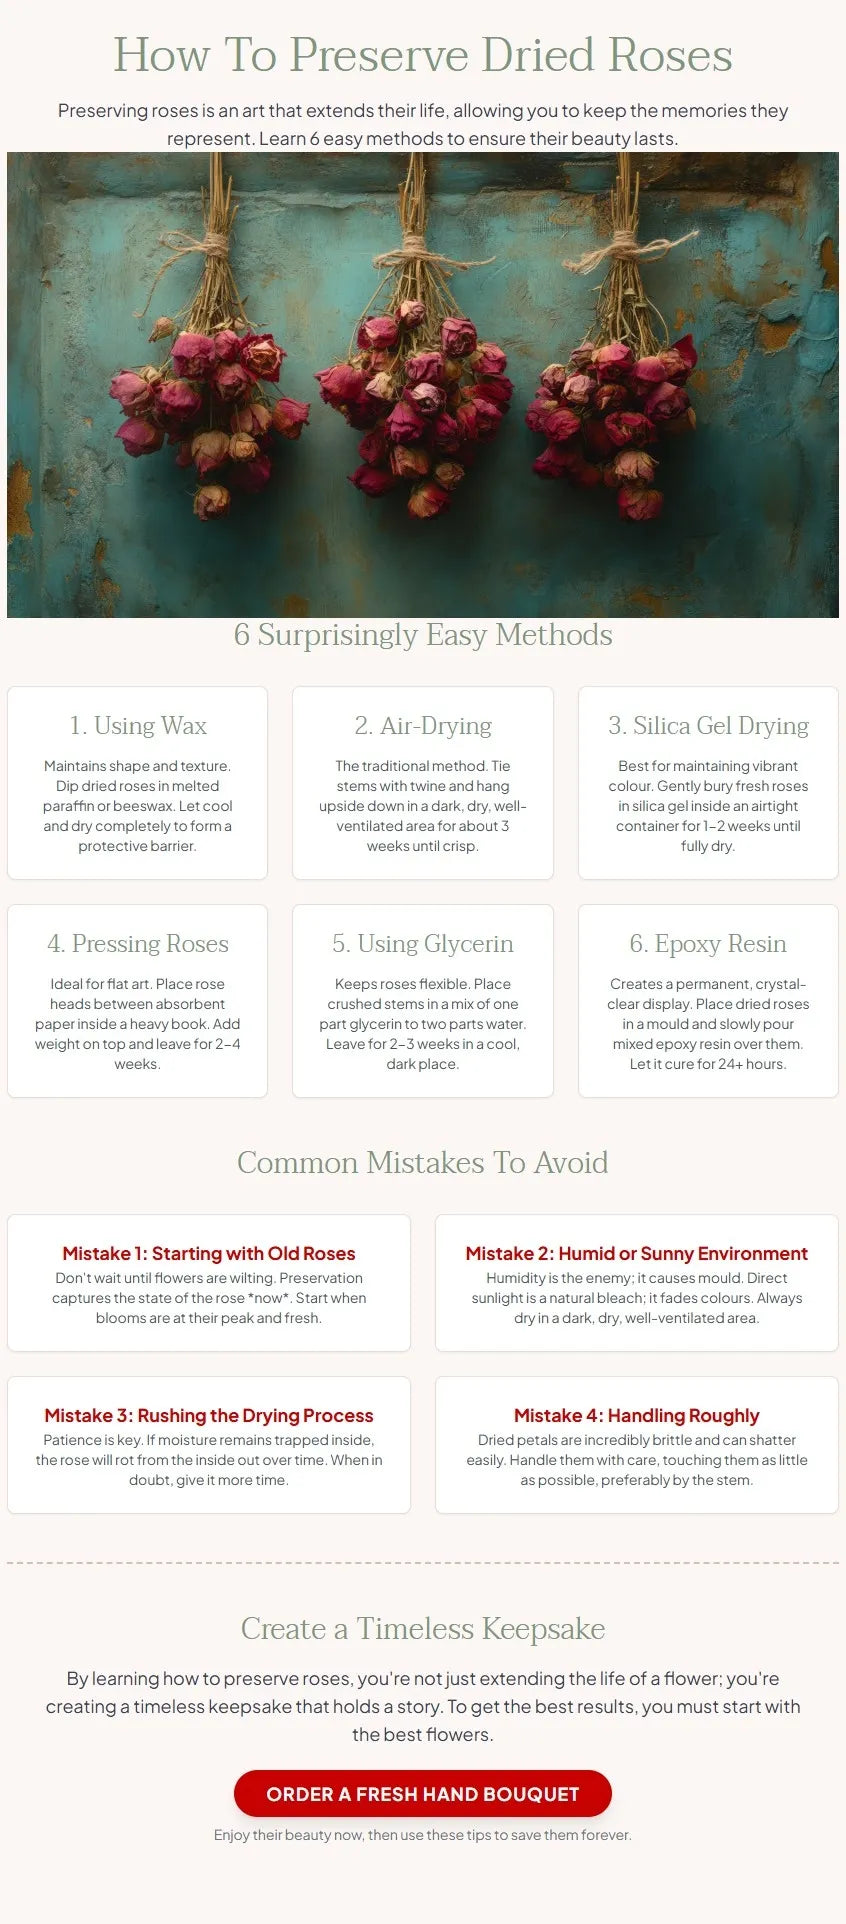
2. Air-Drying Roses

Air drying is the most traditional and natural technique for preserving dried roses. This method can be traced back centuries and was a favourite among Victorians, who would keep dried flowers in their “language of flowers” books as keepsakes and symbols of memories. Here’s how to do it:
-
Gather the Roses: Collect the stems of the roses you wish to dry.
-
Tie with Twine: Securely tie the stems together using twine. Tying roses with twine helps provide support and encourages them to grow in a particular direction or shape.
-
Find a Suitable Location: Choose a well-ventilated, dark area for drying the roses. Exposure to direct sunlight can cause the colours to fade or change, which may not be desirable if you want to maintain the original appearance of the roses.
-
Hang the Roses Upside Down: Hang the tied roses upside down in the selected area. Ensure there is enough space for air to circulate around them.
-
Ensure Proper Air Flow: Make sure the area has good air circulation to prevent mould growth.
-
Let the Roses Dry: Leave the roses to dry naturally. It typically takes about three weeks, often aligning with the lunar cycle.
-
Check for Dryness: After three weeks, check the roses. They should be crisp to the touch when fully dried.
- Store Appropriately: Once dried, store the roses in a place away from humidity and direct sunlight. This will help them last for years.
3. Silica Gel Drying For Vibrancy
For those who want to know how to preserve dried roses while maintaining their original colour and shape, silica gel is the answer. This desiccant absorbs moisture from the flowers, preserving them in a more lifelike state.
By carefully burying roses in a container of silica gel, the moisture is drawn out quickly and efficiently, often within seven days, preserving the roses’ bright colours and preventing the petals from shrivelling.
Fascinatingly, the same silica gel is often found in food and electronics packaging, acting as a guardian against moisture. Here’s how to start:
-
Gather Materials: You will need silica gel, an airtight container, and your fresh roses. Glass containers are often considered the best choice due to their airtight properties, durability, and the ability to observe the drying process without disturbing it.
-
Prepare the Container: Place a layer of silica gel at the bottom of the airtight container. This layer should be thick enough to support the roses without them touching the bottom directly.
-
Trim the Roses: Cut the stems of your roses to the desired length. A good rule of thumb is to keep the stems about 6 to 8 inches long. Shorter stems are easier to work with for this process.
-
Position the Roses: Carefully place the roses on top of the silica gel in the container. Ensure that the roses are not touching each other to allow even drying.
-
Cover with Silica Gel: Gently pour more silica gel over the roses, making sure to cover them completely. The silica gel should get into the petals and surround each rose entirely.
-
Seal the Container: Close the container with a tight-fitting lid to create an airtight environment. This is crucial for the drying process.
-
Wait Patiently: Leave the container sealed for about one to two weeks. The exact time may vary depending on the size and type of roses. Silica gel works relatively quickly compared to other drying methods.
-
Check the Roses: After one to two weeks, gently uncover a rose to check if it’s completely dry. The petals should feel dry and papery.
-
Remove Roses Carefully: Once the roses are dry, carefully remove them from the silica gel. Be gentle to avoid damaging the dried petals.
-
Brush off Excess Gel: Use a soft brush to gently remove any remaining silica gel particles from the roses.
- Store or Display: Your silica gel-dried roses are now ready to be displayed or used in crafts. They should retain more colour and detail compared to other drying methods.
Silica gel drying is a great way to preserve the vibrancy and shape of roses, making them ideal for displays or keepsakes.
4. Pressing Roses

Pressing is a classic method of preserving dried roses, perfect for creating framed art, cards, or other decorative items. It is a popular method among the people of ancient Egypt, where floral and botanical specimens were pressed as biodiversity records. When pressing roses, the key is to use flowers that are not fully opened and to arrange them face down on parchment paper to ensure the final shape is desirable.
Here are steps to properly press roses:.
Pressing roses is a traditional method for preserving their beauty and is ideal for crafting or creating framed displays. Here's a step-by-step guide on how to press roses:
-
Select the Roses: Choose roses that are free from blemishes and are not fully open. The best results come from roses that are just starting to bloom.
-
Prepare the Roses: Gently remove any dirt or debris from the petals. If the roses are wet, allow them to air dry before pressing.
-
Gather Materials: You will need absorbent paper (like parchment or blotting paper), a heavy book, and additional weights (like more books or a brick).
-
Trim the Stems: Cut the stems off the roses, leaving just the flower heads. You can also press individual petals if you prefer.
-
Arrange Roses on Paper: Lay a sheet of your absorbent paper on a flat surface. Place the rose heads face down on the paper, ensuring they do not overlap.
- Cover with Another Sheet: Place another sheet of absorbent paper over the top of the roses.
-
Place in a Heavy Book: Carefully transfer the paper with the roses inside a heavy book. Make sure the flowers are flat and the book closes without damaging them.
- Weigh Down the Book: Place additional weight on top of the book to ensure a good press.
-
Wait for the Roses to Dry: Leave the roses to press for about 2-4 weeks. The drying time can vary depending on the moisture content of the roses and the humidity in your area.
-
Check the Roses: After 2-4 weeks, carefully open the book and check the roses. They should be completely dry and flat.
- Remove and Store: Gently remove the pressed roses from the paper. They are now ready for use in your craft projects or for display.
Pressed roses are a wonderful way to create lasting keepsakes from special occasions or to enjoy the beauty of your garden year-round. Remember that the colour of the roses may change slightly during the pressing process.
5. Advanced Techniques: Using Glycerin
Glycerin is a humectant, which means that it attracts moisture from the air. When used in preserving roses, it replaces the plant’s cells' water, making them flexible and durable.
The glycerin method is a little-known but marvellous technique that results in roses that retain a fresh and supple appearance, almost as if they were still living.
This process can take a few weeks when the roses gradually turn darker. Interestingly, the glycerin used for rose preservation is the same as that found in hand lotions and soap, making it a versatile household ingredient. Here’s a guide on how to use Glycerin for preservation:
-
Gather Supplies: You will need glycerin (available at pharmacies or craft stores), water, a container large enough to hold the roses, and the roses you want to preserve. Glycerin-treated roses remain flexible and supple. Glycerin preserves the natural texture and flexibility of the petals, making them look more lifelike.
-
Prepare the Roses: Choose healthy roses that have not fully opened. Trim the stems to your desired length.
-
Mix the Solution: In your container, mix one part glycerin to two parts water. Stir until the glycerin is fully dissolved.
-
Prepare the Stems: Crush the end of each rose stem slightly with a hammer or the back of a knife. This helps the stem absorb the glycerin solution more effectively.
-
Place Roses in Solution: Put the roses in the glycerin solution, ensuring the stems are fully submerged. The blooms should be above the liquid.
-
Store the Container: Place the container in a cool, dark place. This helps the roses absorb the glycerin slowly and evenly.
-
Wait for Absorption: Leave the roses in the solution for 2-3 weeks. Check periodically to see how the glycerin is absorbing. You'll know the process is complete when the petals feel rubbery and supple.
-
Remove and Dry: Carefully take the roses out of the solution. Gently shake off any excess liquid and hang the roses upside down in a cool, dark place to dry. The roses absorb the glycerin solution over a period of time. This can take anywhere from a few days to several weeks.
-
Final Touch: Once dry, the roses are ready to use. They will have a slightly translucent look and a leathery texture.
- Store Appropriately: Store the glycerin-preserved roses in a dry place away from direct sunlight to maintain their appearance.
This method is particularly good for special crafts or floral arrangements where you want the roses to retain their original beauty and flexibility.
6. Epoxy Resin Preservation

Epoxy resin preservation is a method that has gained popularity in recent years, especially among modern crafters and artists. Encasing dried roses in resin protects them from the elements and turns them into striking decorative pieces.
The clarity of the resin can be likened to that of amber, which has been known to preserve specimens for millions of years. This method of maintaining dried roses creates a snapshot of the flower in full bloom, capturing its beauty in a state that seems almost suspended in time.
However, working with resin requires precision and safety precautions, such as working in a well-ventilated area and wearing protective gear. Here’s how to do it right:
-
Gather Materials: You'll need epoxy resin and hardener (usually sold together), a mixing tool, a suitable mould (like a sphere or cube shape), gloves, and your roses. Epoxy resin forms a strong and protective layer around the roses. This layer shields the flowers from physical damage, UV radiation, and moisture, preventing them from deteriorating over time.
-
Prepare the Workspace:
Cover your workspace with plastic or newspaper to protect it from spills. Work in a well-ventilated area since resin can emit fumes.
-
Mix the Resin and Hardener: Follow the instructions on your epoxy resin kit to mix the resin and hardener. Typically, this is a 1:1 ratio, but it can vary. Stir slowly to minimise air bubbles.
-
Pour the First Layer: Pour a small amount of the mixed resin into the bottom of your mould. This will be the base for the rose to sit on. Let it cure for a few hours until it's semi-solid.
-
Position the Rose:
Once the base layer is tacky, place the rose in the mould. You might need to trim the stem or petals to fit the mould properly.
-
Pour More Resin: Carefully pour the remaining resin over the rose, ensuring it's completely covered. Pour slowly to avoid creating air bubbles.
-
Remove Air Bubbles: If air bubbles form, you can gently pop them with a toothpick or use a heat gun or hairdryer on a low setting to bring them to the surface and pop.
-
Let it Cure: Leave the resin to cure completely. This can take anywhere from 24 hours to several days, depending on the resin type and environmental factors.
-
Remove from Mould: Once the resin is fully cured and hard, carefully remove your preserved rose from the mould.
- Finishing Touches: If necessary, you can sand or polish the resin to remove any imperfections or sharp edges.
Remember that working with resin requires patience and precision, but the end result can be truly remarkable.
Common Mistakes To Avoid When Preserving Dried Roses
Knowing how to preserve dried roses is only half the battle; knowing what not to do is just as crucial for achieving beautiful, long-lasting results. By avoiding these common pitfalls, you can ensure your dried roses preservation project is a success, resulting in stunning keepsakes rather than disappointment.
Mistake 1: Starting with Old or Damaged Roses
One of the most frequent errors is trying to preserve roses that are already past their prime. While it's tempting to wait until the very last moment, using flowers that are already wilting, browning, or have bruised petals will lead to a poor outcome.
- Why it's a mistake: The preservation process captures the state of the rose at that moment. If it's already deteriorating, preservation will only highlight its imperfections. The petals will likely become more brittle, turn a muddy brown, and may even fall off during the process.
- How to avoid it: For the best results, begin the preservation process when your roses are at their peak, fully bloomed but still fresh and vibrant. Choose flowers with firm stems and unblemished petals.
Mistake 2: Preserving in a Humid or Sunny Environment
Where you choose to dry your roses has a massive impact on the final product. Many people make the mistake of leaving them in a bright kitchen or a damp room.
- Why it's a mistake: Humidity is the enemy of preservation. It slows down the drying process significantly and can lead to the growth of mould or mildew, completely ruining your flowers. Direct sunlight acts as a natural bleach, causing the beautiful, rich colours of your roses to fade dramatically.
- How to avoid it: Always choose a location that is dark, dry, and has good air circulation. A spare cupboard, attic, or rarely used room is often the perfect spot for air-drying.
Mistake 3: Rushing the Drying Process

Patience is a key ingredient in successful flower preservation. It can be tempting to check on your roses constantly or end the process prematurely because they look dry on the outside.
- Why it's a mistake: If even a small amount of moisture remains trapped deep within the flower head or stem, it can cause the rose to rot from the inside out over time. This is especially critical if you plan to encase the rose in resin, as any moisture will cause the resin to cure cloudy.
- How to avoid it: Stick to the recommended drying times for your chosen method (e.g., 2-3 weeks for air-drying). To check if they are ready, gently touch a petal. It should feel crisp and papery, with no softness or coolness.
Mistake 4: Handling the Dried Roses Too Roughly
Once the preservation is complete, the roses become incredibly delicate. Handling them with the same force you would a fresh flower is a recipe for disaster.
- Why it's a mistake: Dried petals are brittle and can shatter or break with very little pressure. Over-handling can quickly lead to a pile of colourful dust instead of a beautifully preserved flower.
- How to avoid it: Handle your preserved roses with care, touching them as little as possible. When you do need to move them, hold them by the firmest part of the stem. Use soft brushes or a gentle puff of air to clean them instead of wiping them with a cloth.
Conclusion About How To Preserve Dried Roses
Roses have been a symbol of many emotions and occasions throughout history. By learning how to preserve dried roses, you’re not just extending the life of a flower; you’re creating a timeless keepsake that holds a story, a piece of personal history that can be cherished forever.
To get the best results, you must start with the best flowers. Beautiful preserved roses can only come from fresh, healthy bouquets. As the best florist in Singapore, we deliver the freshest premium roses directly to your door, giving you the perfect start for your preservation project.
Ready to create a memory that lasts? Order a fresh hand bouquet from Windflower Florist today. Enjoy their beauty now, and then use these simple tips to save them forever.
Looking for Long-Lasting Flowers?
Our preserved and dried flower arrangements last 1–3 years. Perfect for home decor or a lasting gift. Free delivery across Singapore.
Browse Preserved Flowers →Frequently Asked Questions About How To Preserve Dried Roses
Can I Preserve Roses That Have Already Started To Wilt?
Yes, it is possible to preserve roses that have begun to wilt, but the results may not be as aesthetically pleasing as preserving fresh flowers. The key is to start the preservation process before the petals become too dry or brittle.
For wilting roses, the silica gel method might be the best as it can help remove moisture quickly and potentially restore some of the rose's original shape.
How Long Do Preserved Roses Last?
The lifespan of preserved roses depends on the method used and the environment in which they are kept. Air-dried roses can last for years if kept away from humidity and direct sunlight.
Silica gel-preserved roses can retain their colour for months to a few years, while roses preserved with glycerin or in resin can last even longer, potentially decades, with proper care.
Can I Use Hairspray To Preserve Dried Roses?
Hairspray is sometimes used as a quick fix to help hold the petals of dried roses in place and add a slight sheen. However, it is not a long-term preservation method. Over time, hairspray can yellow the petals and become sticky, attracting dust and grime.
Are There Any Health Concerns With Preserving Roses Using Certain Methods?
When using chemicals like silica gel or epoxy resin, it's important to work in a well-ventilated area and use protective equipment, such as gloves and masks, to avoid inhaling fumes or coming into contact with materials that could be irritating or harmful to the skin.


